The Quest to Remake Maps
We have had a looming problem on our hands for a while at the center: what we should do about our aging map projects living on a dying server. We have many projects that rely heavily on maps, from Cuban Battlefields to Civil War Washington, all previously living their lives on an 8 year old server whose ESRI license ($$$) is set to expire at the end of the summer. Furthermore, many of the maps were only viewable in Flash, a technology whose days are numbered. With this in mind, it was time to recreate maps with a new technology.
So okay, no big deal, right? Just take the old map files and put them in some new technology? The problem was, we no longer have a GIS specialist in the CDRH. The next problem was that most of the files can’t be picked up straight out of the ESRI server and put into something else. What were we to do?
Thanks to excellent notes left by Rob Shepard and Nicholas Gliserman, our previous CDRH GIS experts, I had a pretty good starting foundation for the next steps. Despite my trepidation, after only a few hours I was happily exporting all sorts of data from existing projects to use in open source alternatives to ESRI.
Specifically, for this demo, I walk through how to take vector data from a geodatabase (.gdb) file and turn it into GeoJSON. I used ArcMap, one of the tools in ESRI ArcGIS Desktop. Unfortunately, ArcMap is not open source, but you should be able to apply the below concepts to opensource software like QGIS or GRASS instead. I know that I’ll be looking into that in the near future, so keep your eye out for an updated demo in the next year, assuming I’m successful!
Viewing the Files in ArcMap
When you open ArcMap, select the new map default recommendation from the prompt, then right click on Layers and “Add Data”

You may need to add a data source (directory) so that you can find the gdb in question, but once you’ve navigated to the directory with your gdb or other map related files, ArcMap should be able to pick apart the components. That is to say, if a gdb contains many layers, you will be able to import them into your map one at a time or in bulk. Below, we are adding only one layer:

Once you have added the layer, it should show up in the window on the right of ArcMap. You can right click on the layer to see all the layer-specific options and information.

It’s easy enough to import a bunch of layers at once, as well. You can also turn off and on multiple layers at once when they’ve been imported.


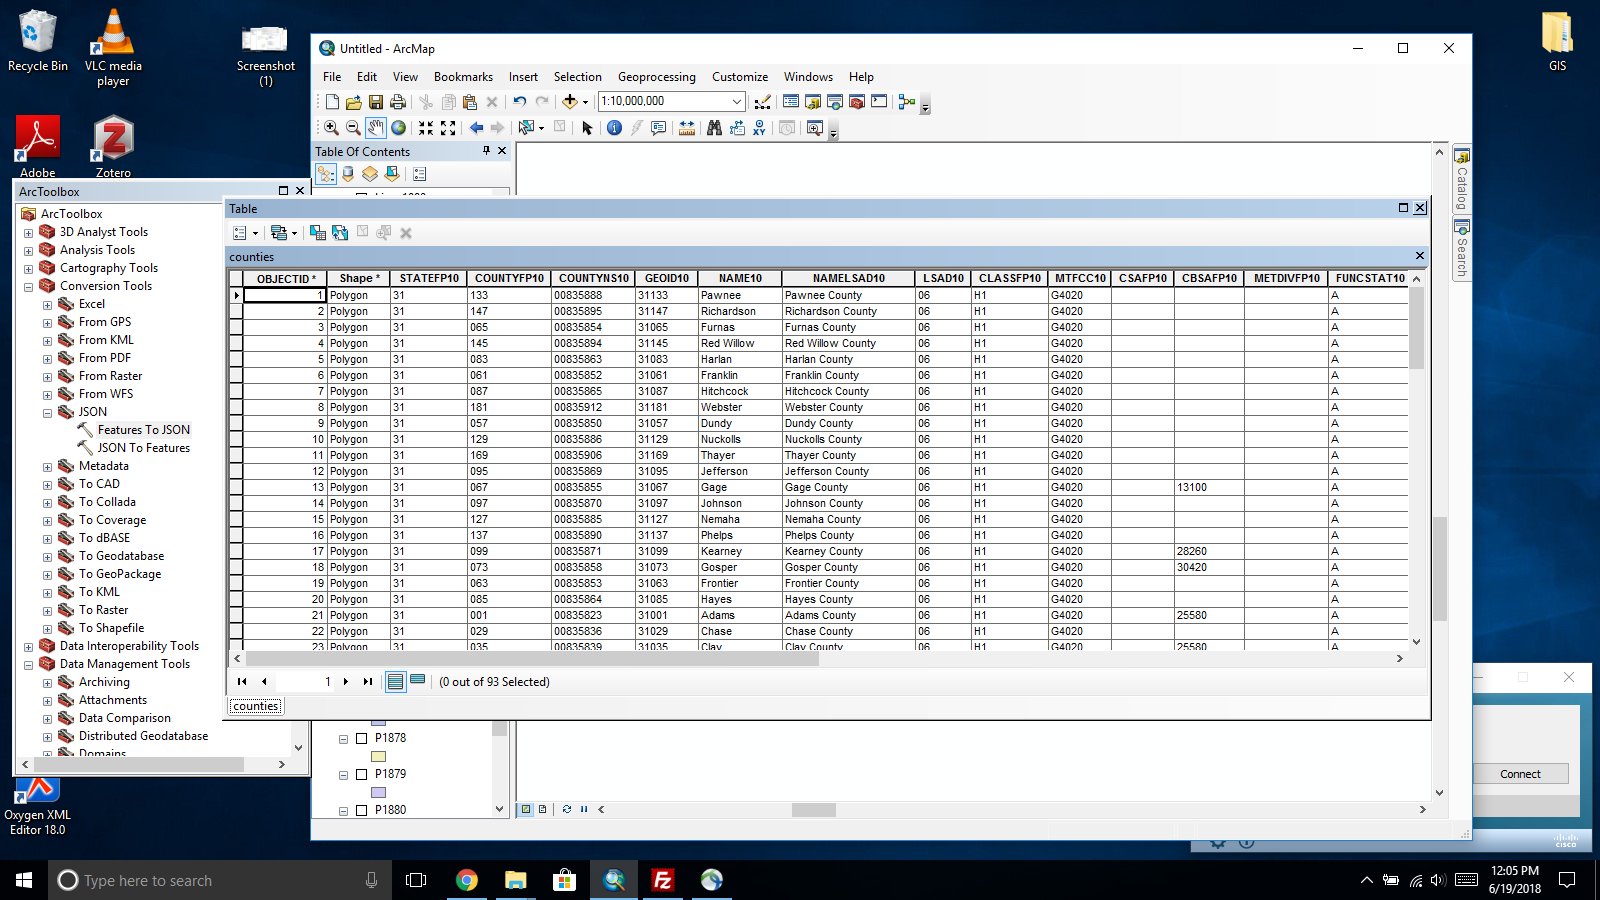
You can inspect layers to see what kind of attributes they have been assigned. For example, a polygon might carry metadata with a county name, country location, and more. Right click the layer then “Open Attribute Table.”
Exporting GeoJSON
Okay, great, you’ve got some files loaded up and showing in a map! Now let’s focus on how to export the vector layers. Vector layers are things like points, lines, polygons…basically anything that’s not a large image / historic map / tiff. Those types of images are raster layers.
But let’s say you’ve got some data on county land sales from 1870 to 1880. That’s gonna be a vector layer so export it in JSON. Assuming that your layer is already loaded up, let’s look at the properties. Right click the layer and select “Properties…”
On the “Source” tab of the properties, you can see the boundaries that the layer fits into as well as the coordinate system and angular units. Ideally, your layer will look something like the below: recognizable latitude / longitude, WGS_1984, and degrees for the angular units. If that’s the case, skip a few steps ahead to exporting the GeoJSON. But if your extent is made of huge numbers, the angular units are “meters” and your coordinate system doesn’t match this, then it’s time to put the layer into a new projection!

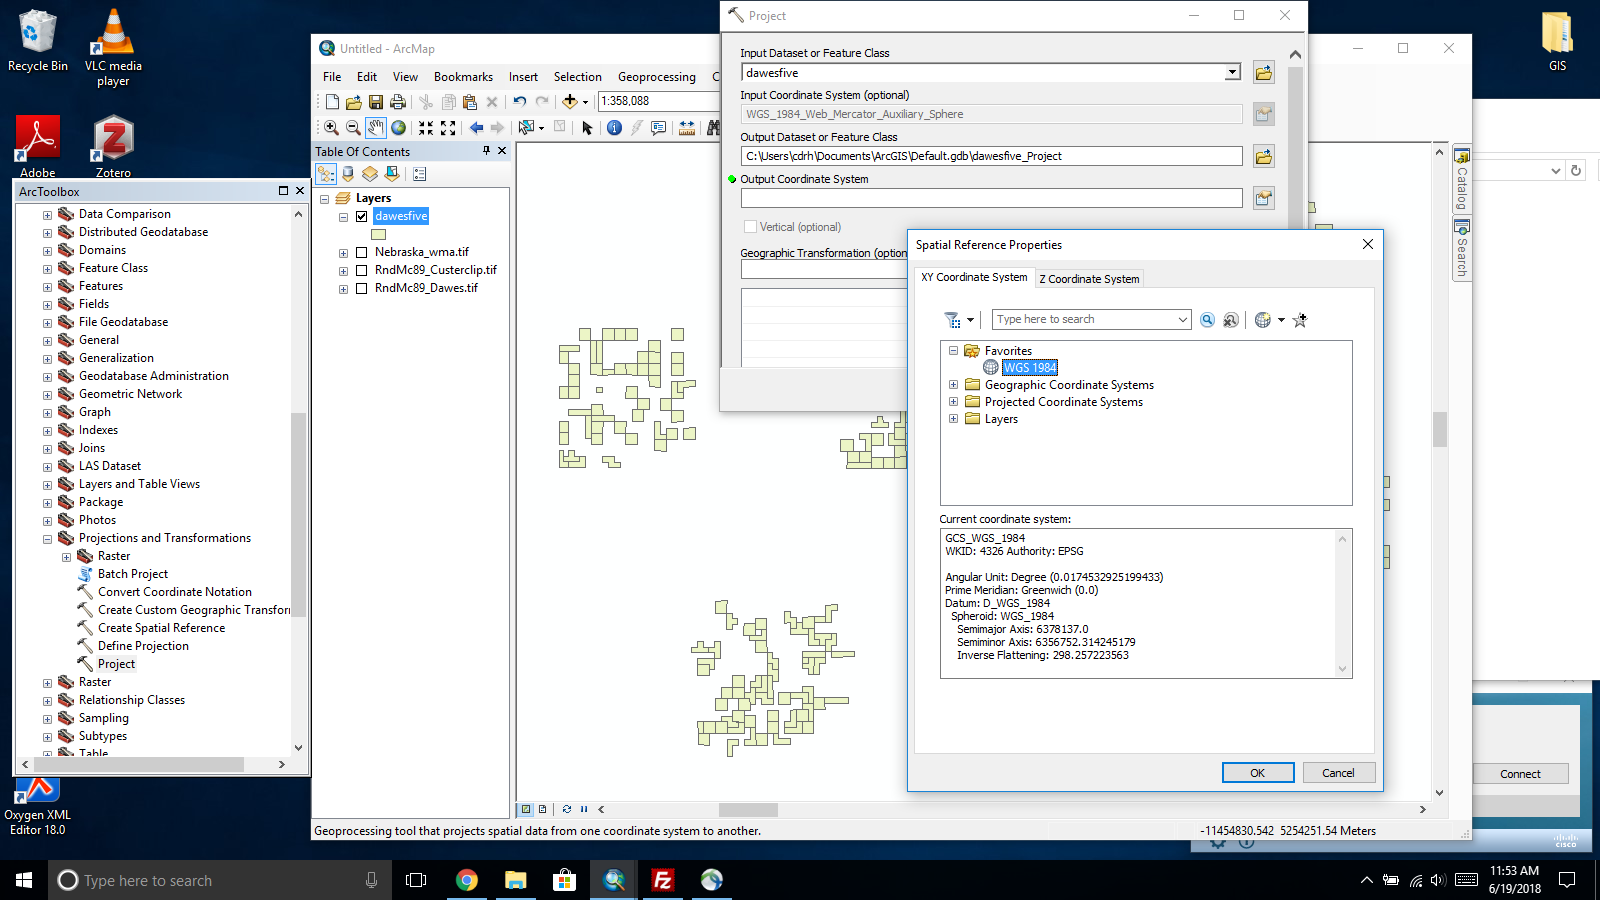
Let’s go ahead and assume that you need to change the projection to something exportable into GeoJSON. Fish around in the menu bar until you find the Arc Toolbox (showing on the left of the image below). Under Projections and Transformations, click Project. Select your layer, select an output dataset (it probably doesn’t matter if you’re never using this layer again), then search for an Output Coordinate System. I added WGS_1984 to my favorites in order to find it quickly, but otherwise if you type in “4235” into the search, you should find it among the results. GCS_WGS_1984 and degrees is what you’re looking for. Note: you can also set up a batch projection if you have a lot of layers you need to convert all at once.
Hit okay and ArcMap will add your projected layer into the viewer. Notice below that now I have the original dawesfive and the new dawesfive_Project. In the ArcToolbox, hit Conversion Tools > JSON > Features to JSON. Select your newly projected layer, choose an output location you’ll remember, and check the “GeoJSON” box.

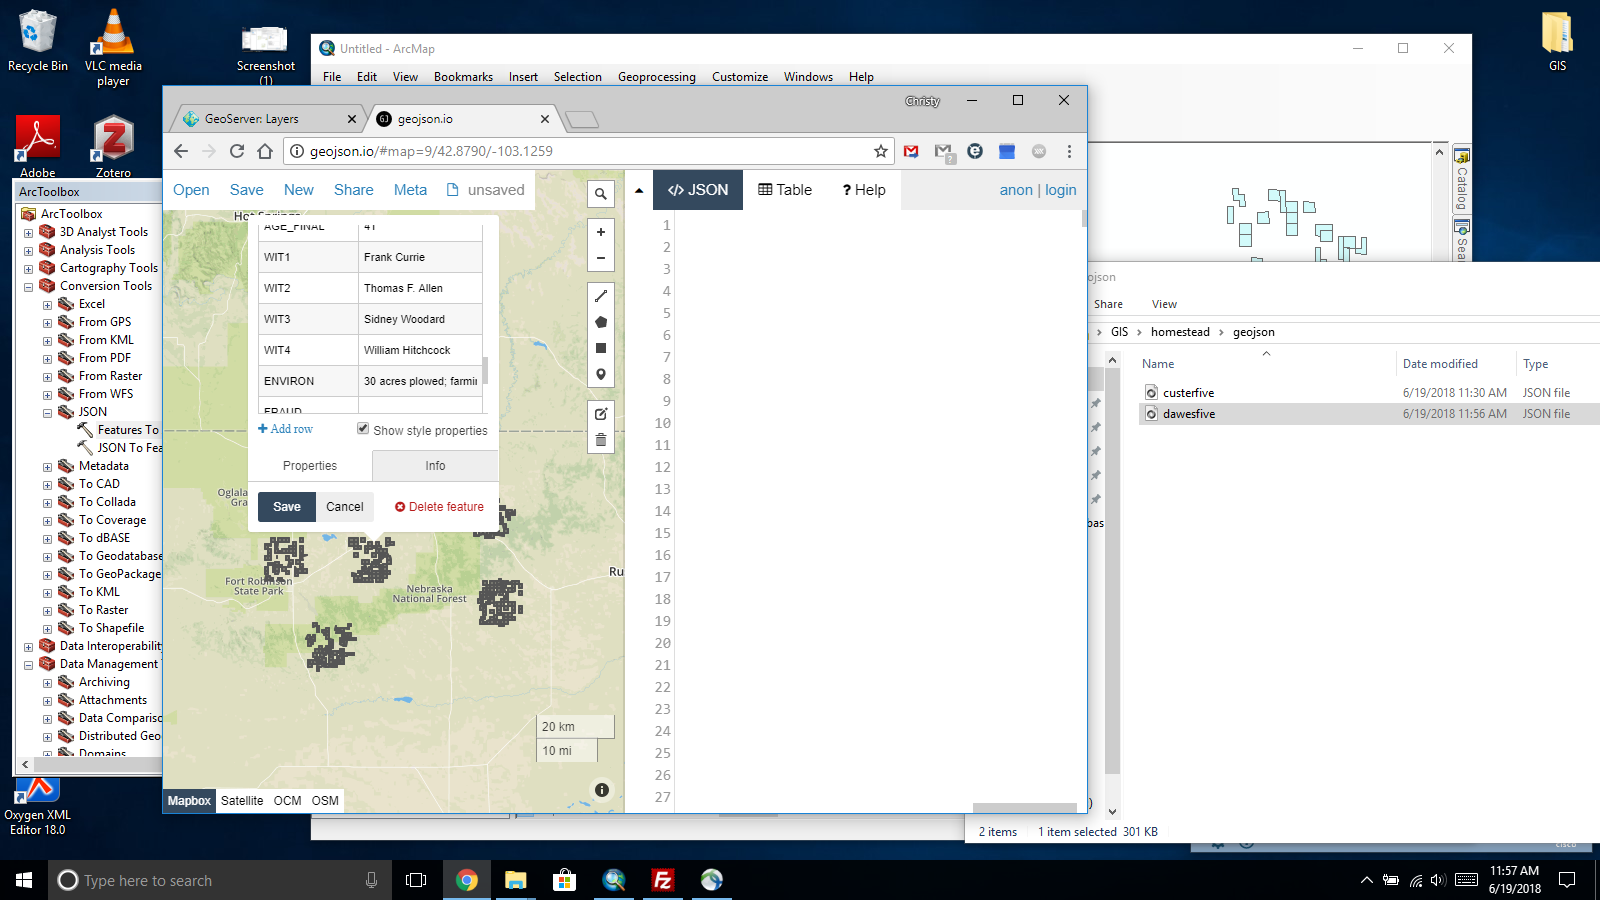
Now you will have a GeoJSON (.json) file at the location you selected. If you open it in a text editor, you will find a somewhat human readable file with all the information about the attributes as well as geographic instructions for drawing points, lines, and polygons. There are several websites that allow you to test GeoJSON, but I like to use geojson.io from Mapbox. If you open your GeoJSON file, you should see a version of your layer displayed and you can inspect the attributes, like below. Congratulations, you’ve successfully gotten GeoJSON out of a gdb file!
So what’s next? Well, in our case, CDRH developers import it into Leaflet.js. However, it’s also nice just to keep the GeoJSON files in the same place as the original shapefiles, etc, for archival purposes. Having a version of the data that a text editor can open is very valuable for a place like ours where we don’t always have a GIS expert on hand to work with files.